上传 jar 到海外服务器往往比较慢 , 随着部署频率变高 , 这种上传 jar 再部署容器的方式变得不太能满足需求 . 这里简单改造下为项目集成插件打包镜像到私有仓库 , 服务器直接拉去私有仓库的镜像进行部署
首先本地是需要有 Docker 环境的
以 若依 项目来说明 , 直接在 ruoyi-admin 下集成 dockerfile-maven-plugin 插件
1
2
3
4
5
6
7
8
9
10
11
12
13
14
15
16
17
18
19
20
21
22
23
24
25
26
27
28
29
30
31
32
33
34
35
36
37
38
39
40
41
42
43
44
|
<plugin>
<groupId>com.spotify</groupId>
<artifactId>dockerfile-maven-plugin</artifactId>
<version>${dockerfile-maven-plugin.version}</version>
<executions>
<execution>
<id>tag-latest</id>
<phase>package</phase>
<goals>
<goal>build</goal>
<goal>tag</goal>
<goal>push</goal>
</goals>
<configuration>
<tag>latest</tag>
</configuration>
</execution>
<execution>
<id>tag-version</id>
<phase>package</phase>
<goals>
<goal>tag</goal>
<goal>push</goal>
</goals>
<configuration>
<tag>${my.version}</tag>
</configuration>
</execution>
</executions>
<configuration>
<useMavenSettingsForAuth>true</useMavenSettingsForAuth>
<username>仓库用户名</username>
<password>仓库密码</password>
<contextDirectory>${project.basedir}</contextDirectory>
<dockerfile>Dockerfile</dockerfile>
<buildArgs>
<JAR_FILE>${project.build.finalName}.jar</JAR_FILE>
</buildArgs>
</configuration>
</plugin>
|
这里 executions 里重点说明一下 , 配置是在 maven package 命令后执行打包镜像上传操作 , 两个 execution 是将打包镜像并且打标签为自定义版本号及 latest 然后推送到私有仓库 , 符合我们在拉取镜像时的习惯
这里其实不是完整的配置 , 没有配置仓库相关信息 , 因为我们要通过 profile 去区分不同环境
在同文件里添加
1
2
3
4
5
6
7
8
9
10
11
12
13
14
15
16
17
18
19
20
21
22
23
24
25
26
27
28
29
30
31
32
33
34
35
36
37
38
39
40
41
42
43
44
45
| <profiles>
<profile>
<id>production</id>
<build>
<plugins>
<plugin>
<groupId>com.spotify</groupId>
<artifactId>dockerfile-maven-plugin</artifactId>
<version>${dockerfile-maven-plugin.version}</version>
<configuration>
<repository>生产仓库</repository>
<buildArgs>
<ACTIVE>druidprod,prod</ACTIVE>
</buildArgs>
</configuration>
</plugin>
</plugins>
</build>
</profile>
<profile>
<id>test</id>
<build>
<plugins>
<plugin>
<groupId>com.spotify</groupId>
<artifactId>dockerfile-maven-plugin</artifactId>
<version>${dockerfile-maven-plugin.version}</version>
<configuration>
<repository>测试仓库</repository>
<buildArgs>
<ACTIVE>druidtest,test</ACTIVE>
</buildArgs>
</configuration>
</plugin>
</plugins>
</build>
</profile>
</profiles>
|
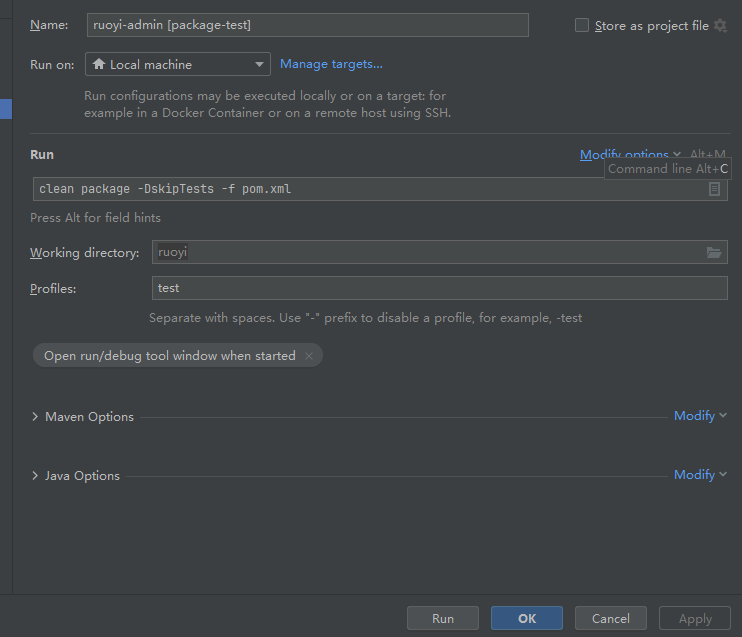
配置完后直接点击 IDEA 右侧的 Maven package 会打包成功, 但是构建镜像失败 ,因为没有指定 profile 环境
这里可以通过命令行执行
1
| mvn clean package -DskipTests -f pom.xml -P test
|
-P 后面的为环境id ,以上演示则为 production / test
也可以在 IDEA 启动项做配置
这里附 Dockerfile
1
2
3
4
5
6
7
8
9
10
11
|
FROM frolvlad/alpine-java:jdk8-slim
VOLUME /tmp
COPY target/ruoyi-admin.jar app.jar
ARG ACTIVE
ENV ACTIVE $ACTIVE
ENV TIMEZONE="America/Los_Angeles"
ENTRYPOINT ["java","-jar","-Duser.timezone=${TIMEZONE}","/app.jar","--spring.profiles.active=${ACTIVE}"]
|
参考链接