Gradle是一个基于Apache Ant和Apache Maven概念的项目自动化构建工具.它使用一种基于Groovy的特定领域语言(DSL)来声明项目设置,抛弃了基于XML的各种繁琐配置.
IDEA 全称IntelliJ IDEA,是java语言开发的集成环境,IntelliJ在业界被公认为最好的java开发工具之一,尤其在智能代码助手、代码自动提示、重构、J2EE支持、Ant、JUnit、CVS整合、代码审查、 创新的GUI设计等方面的功能可以说是超常的.
以上为百度的简介.从事Android的童鞋应该不难发现Gradle以及Android Studio的强(hen)大(ka).🤫而AS是基于IntelliJ IDEA开发的.习惯了Gradle的便捷,于是开始基于Gradle+IDEA构建Java项目.
环境准备
1. 数据库MySql
在MySql Downloads下载对应的版本并安装
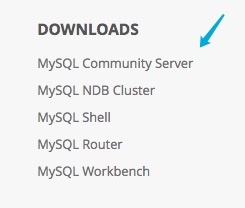
此处笔者在macOS上安装5.7.21后打开系统偏好设置,遇到无法加载MySql面板的问题.一番搜索🔍后发现是macOS版本与MySql不兼容,选择低版本的MySql如5.6.39即可.

2. IntelliJ IDEA
请自行安(po)装(jie).
3. Tomcat
请自行下载解压.如若是macOS或是Linux上解压后需进入bin目录执行下命令chmod u+x *.sh修改权限
创建项目
点击 Create New Project
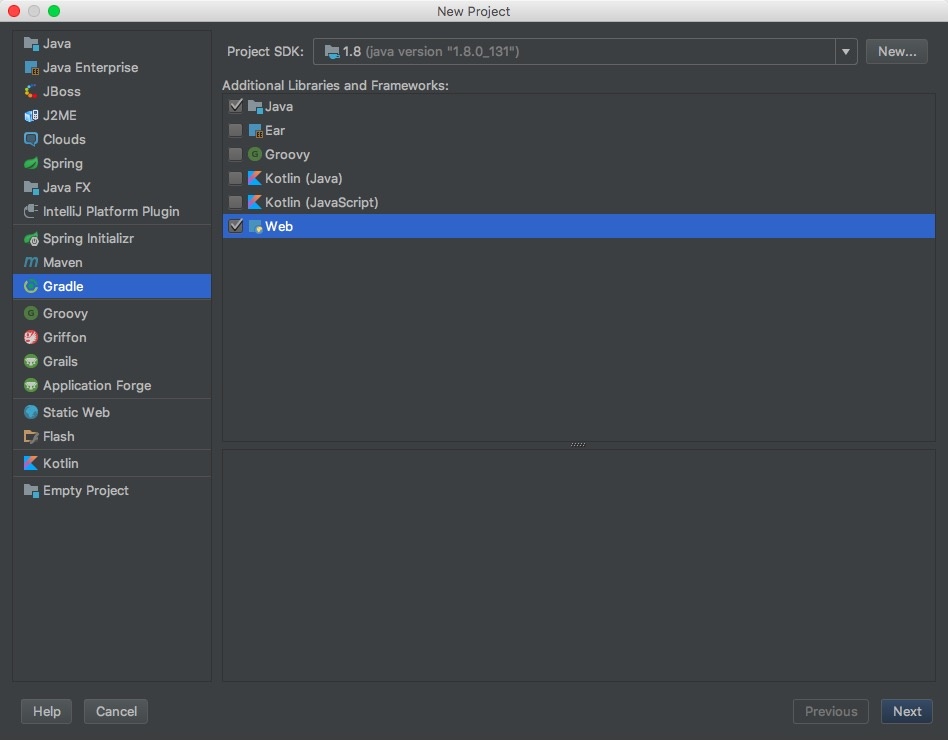
选择基于Gradle的Java Web项目
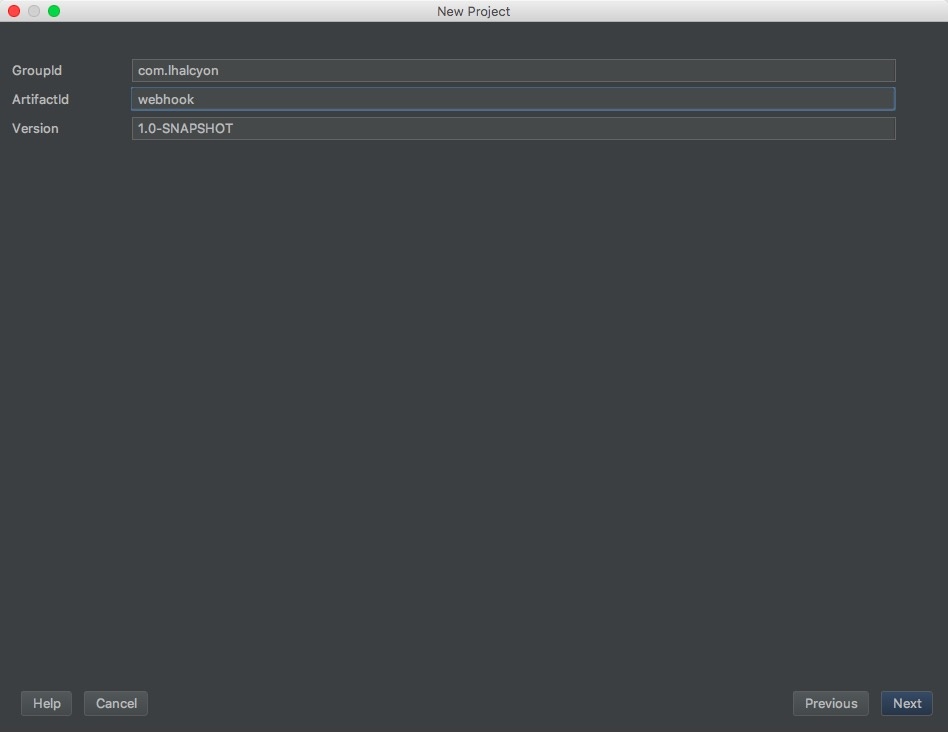
填写GroupId和ArtifactId
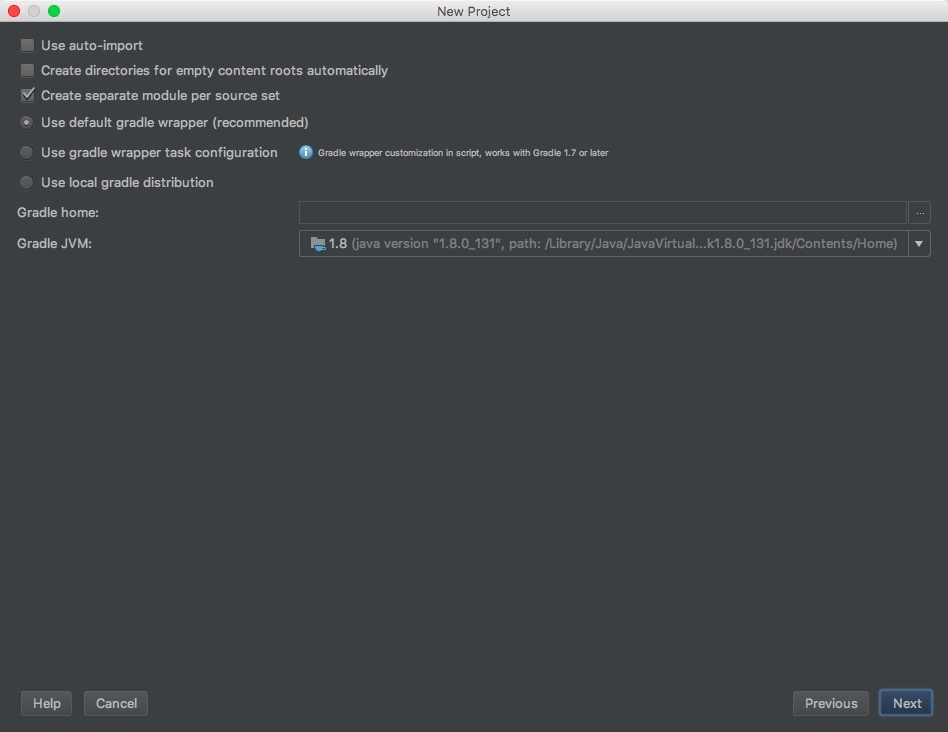
选择gradle.可使用默认的,可使用本地的
接着选择项目目录,基本项目创建好了,接下来进入文件配置
文件配置
首先创建java和resources目录,并且创建包以及web.xml.
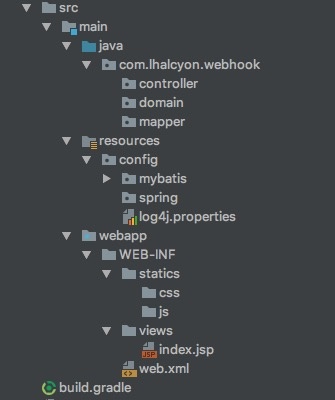
log4j.properties
1
2
3
4
5
6
7
8
9
10
11
12
13
14
15
16
17
18
19
20
|
log4j.rootLogger=DEBUG, A1 ,R
log4j.appender.A1=org.apache.log4j.ConsoleAppender
log4j.appender.A1.layout=org.apache.log4j.PatternLayout
log4j.appender.A1.layout.ConversionPattern=%-d{yyyy-MM-dd HH\:mm\:ss} [%c]-[%p] %m%n
log4j.appender.R=org.apache.log4j.RollingFileAppender
log4j.appender.R.File=/Users/xx/Documents/ServerLog
log4j.appender.R.MaxFileSize=100KB
log4j.appender.R.MaxBackupIndex=1
log4j.appender.R.layout=org.apache.log4j.PatternLayout
log4j.appender.R.layout.ConversionPattern=%p %t %c - %m%n
|
以上输出文件地址自行更改
generatorConfig.xml
1
2
3
4
5
6
7
8
9
10
11
12
13
14
15
16
17
18
19
20
21
22
23
24
25
26
27
28
29
30
31
32
33
34
35
36
37
38
39
40
41
42
43
44
45
46
47
| <?xml version="1.0" encoding="UTF-8"?>
<!DOCTYPE generatorConfiguration
PUBLIC "-//mybatis.org//DTD MyBatis Generator Configuration 1.0//EN"
"http://mybatis.org/dtd/mybatis-generator-config_1_0.dtd">
<generatorConfiguration>
<classPathEntry location="${jarDirection}"/>
<context id="mysql" targetRuntime="MyBatis3">
<jdbcConnection driverClass="${driverClass}"
connectionURL="${connectionURL}"
userId="${userId}"
password="${password}">
</jdbcConnection>
<javaTypeResolver >
<property name="forceBigDecimals" value="false" />
</javaTypeResolver>
<javaModelGenerator
targetPackage="${modelPackage}"
targetProject="${src_main_java}">
<property name="enableSubPackages" value="true" />
<property name="trimStrings" value="true" />
</javaModelGenerator>
<sqlMapGenerator
targetPackage="${sqlMapperPackage}"
targetProject="${src_main_java}">
<property name="enableSubPackages" value="true" />
</sqlMapGenerator>
<javaClientGenerator type="XMLMAPPER"
targetPackage="${mapperPackage}"
targetProject="${src_main_java}">
<property name="enableSubPackages" value="true" />
</javaClientGenerator>
<table tableName="book" domainObjectName="Book">
</table>
</context>
</generatorConfiguration>
|
gradle.properties
1
2
3
4
5
6
|
modelPackage=com.lhalcyon.webhook.domain
mapperPackage=com.lhalcyon.webhook.mapper
sqlMapperPackage=com.lhalcyon.webhook.mapper
|
为了方便扫描,将mapper xml以及接口类放在了同一包下了 😕
jdbc-mysql.properties
1
2
3
4
5
6
7
8
9
10
|
jdbc.jarDirection=/Users/ceyx/.gradle/caches/modules-2/files-2.1/mysql
/mysql-connector-java/5.1.38/dbbd7cd309ce167ec8367de4e41c63c2c8593cc5
/mysql-connector-java-5.1.38.jar
jdbc.driverClassName=com.mysql.jdbc.Driver
jdbc.url=jdbc:mysql://localhost:3306/halcyon
jdbc.user=root
jdbc.pass=root
|
自行填写jdbc.jarDirection路径
build.gradle
1
2
3
4
5
6
7
8
9
10
11
12
13
14
15
16
17
18
19
20
21
22
23
24
25
26
27
28
29
30
31
32
33
34
35
36
37
38
39
40
41
42
43
44
45
46
47
48
49
50
51
52
53
54
55
56
57
58
59
60
61
62
63
64
65
66
67
68
69
70
71
72
73
74
75
76
77
78
79
80
81
82
83
84
85
86
87
88
89
90
91
92
93
94
95
96
| group 'com.lhalcyon'
version '1.0-SNAPSHOT'
apply plugin: 'java'
apply plugin: 'war'
sourceCompatibility = 1.8
repositories {
mavenCentral()
}
configurations {
mybatisGenerator
}
ext{
def prop = new Properties();
file("src/main/resources/config/mybatis/jdbc-mysql.properties")
.withInputStream {
prop.load(it)
}
file("src/main/resources/config/mybatis/gradle.properties")
.withInputStream {
prop.load(it)
}
prop.each {
project.extensions.add("$it.key",it.value);
}
}
dependencies {
testCompile group: 'junit', name: 'junit', version: '4.12'
compile 'org.codehaus.groovy:groovy-all:2.3.11'
compile 'jstl:jstl:1.2'
compile 'org.springframework:spring-aop:4.2.4.RELEASE'
compile 'org.springframework:spring-context:4.2.4.RELEASE'
compile 'org.springframework:spring-beans:4.2.4.RELEASE'
compile 'org.springframework:spring-web:4.2.4.RELEASE'
compile 'org.springframework:spring-webmvc:4.2.4.RELEASE'
compile 'org.springframework:spring-tx:4.2.4.RELEASE'
compile 'org.springframework:spring-jdbc:4.2.4.RELEASE'
compile 'org.springframework:spring-test:4.2.4.RELEASE'
compile 'mysql:mysql-connector-java:5.1.38'
compile 'org.mybatis.generator:mybatis-generator-core:1.3.2'
compile 'org.mybatis:mybatis-spring:1.2.3'
compile 'org.mybatis:mybatis:3.3.0'
compile 'junit:junit:4.12'
compile group: 'commons-dbcp', name: 'commons-dbcp', version: '1.4'
compile group: 'org.aspectj', name: 'aspectjweaver', version: '1.8.13'
compile group: 'log4j', name: 'log4j', version: '1.2.17'
mybatisGenerator 'org.mybatis.generator:mybatis-generator-core:1.3.2'
mybatisGenerator 'mysql:mysql-connector-java:5.1.38'
}
task mybatisGenerate << {
ant.properties['targetProject'] = projectDir.path
ant.properties['jarDirection'] = project['jdbc.jarDirection']
ant.properties['driverClass'] = project['jdbc.driverClassName']
ant.properties['connectionURL'] = project['jdbc.url']
ant.properties['userId'] = project['jdbc.user']
ant.properties['password'] = project['jdbc.pass']
ant.properties['src_main_java'] = sourceSets.main.java.srcDirs[0].path
ant.properties['src_main_resources'] = sourceSets.main.resources.srcDirs[0].path
ant.properties['modelPackage'] = project['modelPackage']
ant.properties['mapperPackage'] = project['mapperPackage']
ant.properties['sqlMapperPackage'] = project['sqlMapperPackage']
ant.taskdef(
name: 'mbgenerator',
classname: 'org.mybatis.generator.ant.GeneratorAntTask',
classpath: configurations.mybatisGenerator.asPath
)
ant.mbgenerator(overwrite: true,
configfile: 'src/main/resources/config/mybatis/generatorConfig.xml',
verbose: true) {
propertyset {
propertyref(name: 'targetProject')
propertyref(name: 'jarDirection')
propertyref(name: 'userId')
propertyref(name: 'driverClass')
propertyref(name: 'connectionURL')
propertyref(name: 'password')
propertyref(name: 'src_main_java')
propertyref(name: 'src_main_resources')
propertyref(name: 'modelPackage')
propertyref(name: 'mapperPackage')
propertyref(name: 'sqlMapperPackage')
}
}
}
|
接着Sync或者点击Import Changes
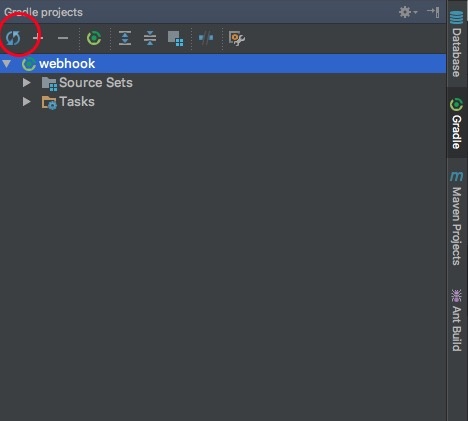
IDEA就会下载依赖包了.依赖版本号均源于Maven Repository
spring-mvc.xml
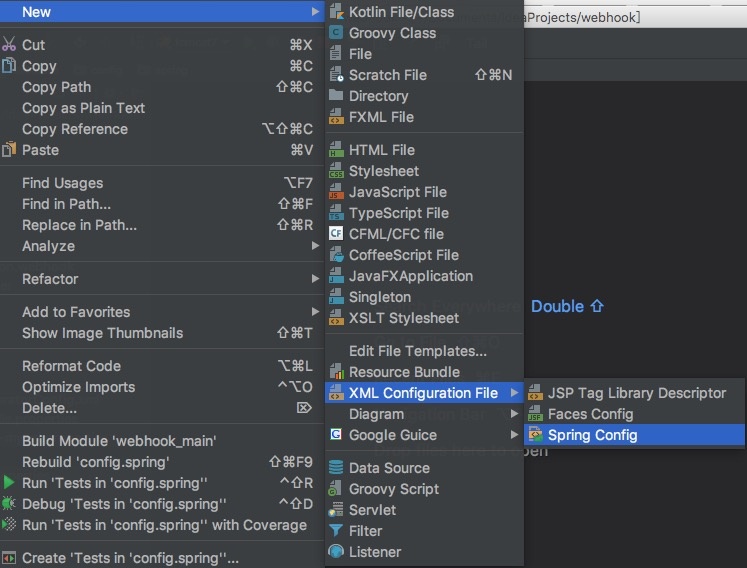
导入依赖后,则可直接创建spring相关xml
1
2
3
4
5
6
7
8
9
10
11
12
13
14
15
16
17
18
19
20
21
22
23
24
25
| <beans xmlns="http://www.springframework.org/schema/beans"
xmlns:xsi="http://www.w3.org/2001/XMLSchema-instance"
xmlns:context="http://www.springframework.org/schema/context"
xmlns:mvc="http://www.springframework.org/schema/mvc"
xsi:schemaLocation="http://www.springframework.org/schema/beans
http://www.springframework.org/schema/beans/spring-beans.xsd
http://www.springframework.org/schema/context
http://www.springframework.org/schema/context/spring-context.xsd
http://www.springframework.org/schema/mvc
http://www.springframework.org/schema/mvc/spring-mvc.xsd">
<context:component-scan base-package="com.lhalcyon.webhook.controller"/>
<bean id="internalResourceViewResolver"
class="org.springframework.web.servlet.view.InternalResourceViewResolver">
<property name="prefix" value="/WEB-INF/views/"/>
<property name="suffix" value=".jsp"/>
</bean>
<mvc:annotation-driven/>
<mvc:resources mapping="/statics/**" location="/WEB-INF/statics/" />
</beans>
|
applicationContext-dao.xml
1
2
3
4
5
6
7
8
9
10
11
12
13
14
15
16
17
18
19
20
21
22
23
24
25
26
27
28
29
30
31
32
33
34
35
36
| <?xml version="1.0" encoding="UTF-8"?>
<beans xmlns="http://www.springframework.org/schema/beans"
xmlns:context="http://www.springframework.org/schema/context" xmlns:p="http://www.springframework.org/schema/p"
xmlns:aop="http://www.springframework.org/schema/aop" xmlns:tx="http://www.springframework.org/schema/tx"
xmlns:xsi="http://www.w3.org/2001/XMLSchema-instance"
xsi:schemaLocation="http://www.springframework.org/schema/beans http://www.springframework.org/schema/beans/spring-beans-4.0.xsd
http://www.springframework.org/schema/context http://www.springframework.org/schema/context/spring-context-4.0.xsd
http://www.springframework.org/schema/aop http://www.springframework.org/schema/aop/spring-aop-4.0.xsd http://www.springframework.org/schema/tx http://www.springframework.org/schema/tx/spring-tx-4.0.xsd
http://www.springframework.org/schema/util http://www.springframework.org/schema/util/spring-util-4.0.xsd">
<context:property-placeholder location="classpath:config/mybatis/jdbc-mysql.properties" />
<bean id="dataSource" class="org.apache.commons.dbcp.BasicDataSource"
destroy-method="close">
<property name="driverClassName" value="${jdbc.driverClassName}" />
<property name="url" value="${jdbc.url}" />
<property name="username" value="${jdbc.user}" />
<property name="password" value="${jdbc.pass}" />
<property name="maxActive" value="10" />
<property name="maxIdle" value="5" />
</bean>
<bean id="sqlSessionFactory" class="org.mybatis.spring.SqlSessionFactoryBean">
<property name="dataSource" ref="dataSource" />
</bean>
<bean class="org.mybatis.spring.mapper.MapperScannerConfigurer">
<property name="basePackage" value="com.lhalcyon.webhook.mapper"/>
</bean>
</beans>
|
applicationContext-service.xml
1
2
3
4
5
6
7
8
9
10
11
12
13
14
| <?xml version="1.0" encoding="UTF-8"?>
<beans xmlns="http://www.springframework.org/schema/beans"
xmlns:context="http://www.springframework.org/schema/context" xmlns:p="http://www.springframework.org/schema/p"
xmlns:aop="http://www.springframework.org/schema/aop" xmlns:tx="http://www.springframework.org/schema/tx"
xmlns:xsi="http://www.w3.org/2001/XMLSchema-instance"
xsi:schemaLocation="http://www.springframework.org/schema/beans http://www.springframework.org/schema/beans/spring-beans-4.0.xsd
http://www.springframework.org/schema/context http://www.springframework.org/schema/context/spring-context-4.0.xsd
http://www.springframework.org/schema/aop http://www.springframework.org/schema/aop/spring-aop-4.0.xsd http://www.springframework.org/schema/tx http://www.springframework.org/schema/tx/spring-tx-4.0.xsd
http://www.springframework.org/schema/util http://www.springframework.org/schema/util/spring-util-4.0.xsd">
<context:component-scan base-package="com.lhalcyon.webhook.service"/>
</beans>
|
applicationContext-trans.xml
1
2
3
4
5
6
7
8
9
10
11
12
13
14
15
16
17
18
19
20
21
22
23
24
25
26
27
28
29
30
31
32
| <?xml version="1.0" encoding="UTF-8"?>
<beans xmlns="http://www.springframework.org/schema/beans"
xmlns:context="http://www.springframework.org/schema/context" xmlns:p="http://www.springframework.org/schema/p"
xmlns:aop="http://www.springframework.org/schema/aop" xmlns:tx="http://www.springframework.org/schema/tx"
xmlns:xsi="http://www.w3.org/2001/XMLSchema-instance"
xsi:schemaLocation="http://www.springframework.org/schema/beans http://www.springframework.org/schema/beans/spring-beans-4.0.xsd
http://www.springframework.org/schema/context http://www.springframework.org/schema/context/spring-context-4.0.xsd
http://www.springframework.org/schema/aop http://www.springframework.org/schema/aop/spring-aop-4.0.xsd http://www.springframework.org/schema/tx http://www.springframework.org/schema/tx/spring-tx-4.0.xsd
http://www.springframework.org/schema/util http://www.springframework.org/schema/util/spring-util-4.0.xsd">
<bean id="transactionManager"
class="org.springframework.jdbc.datasource.DataSourceTransactionManager">
<property name="dataSource" ref="dataSource" />
</bean>
<tx:advice id="txAdvice" transaction-manager="transactionManager">
<tx:attributes>
<tx:method name="insert*" propagation="REQUIRED" />
<tx:method name="delete*" propagation="REQUIRED" />
<tx:method name="update*" propagation="REQUIRED" />
<tx:method name="query*" propagation="SUPPORTS" read-only="true" />
<tx:method name="get*" propagation="SUPPORTS" read-only="true" />
</tx:attributes>
</tx:advice>
<aop:config>
<aop:advisor advice-ref="txAdvice"
pointcut="execution(* com.lhalcyon.webhook.service.*.*(..))" />
</aop:config>
</beans>
|
web.xml
1
2
3
4
5
6
7
8
9
10
11
12
13
14
15
16
17
18
19
20
21
22
23
24
25
26
27
28
29
30
31
32
33
34
35
36
37
38
39
40
41
42
43
44
45
46
47
| <?xml version="1.0" encoding="UTF-8"?>
<web-app xmlns="http://java.sun.com/xml/ns/javaee"
xmlns:xsi="http://www.w3.org/2001/XMLSchema-instance"
xsi:schemaLocation="http://java.sun.com/xml/ns/javaee
http://java.sun.com/xml/ns/javaee/web-app_3_0.xsd"
version="3.0">
<context-param>
<param-name>contextConfigLocation</param-name>
<param-value>classpath:config/spring/applicationContext-*.xml</param-value>
</context-param>
<listener>
<listener-class>org.springframework.web.context.ContextLoaderListener</listener-class>
</listener>
<servlet>
<servlet-name>index-dispather</servlet-name>
<servlet-class>org.springframework.web.servlet.DispatcherServlet</servlet-class>
<init-param>
<param-name>contextConfigLocation</param-name>
<param-value>classpath*:config/spring/spring-mvc.xml</param-value>
</init-param>
</servlet>
<servlet-mapping>
<servlet-name>index-dispather</servlet-name>
<url-pattern>/</url-pattern>
</servlet-mapping>
<filter>
<filter-name>CharacterEncodingFilter</filter-name>
<filter-class>org.springframework.web.filter.CharacterEncodingFilter</filter-class>
<init-param>
<param-name>encoding</param-name>
<param-value>utf-8</param-value>
</init-param>
</filter>
<filter-mapping>
<filter-name>CharacterEncodingFilter</filter-name>
<url-pattern>/*</url-pattern>
</filter-mapping>
</web-app>
|
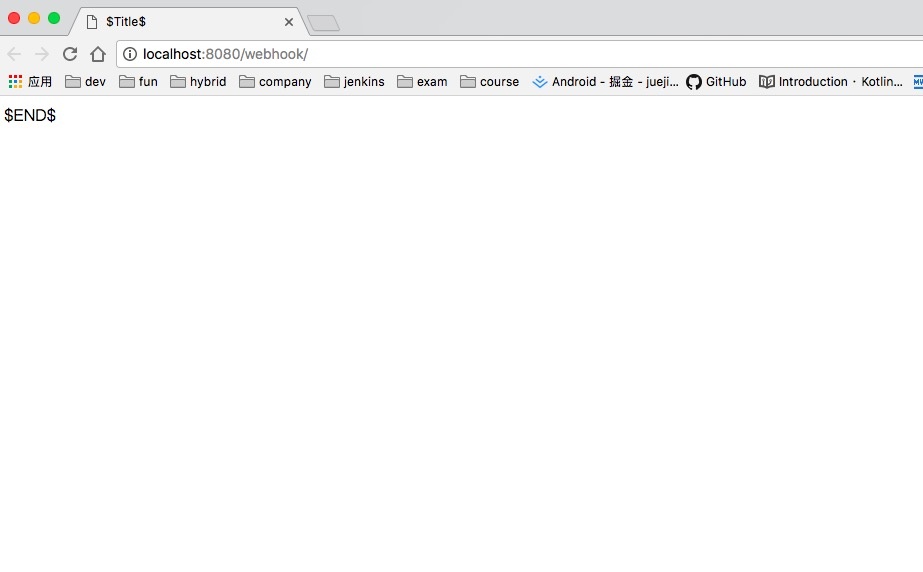
Tomcat部署
Run->Edit Configurations
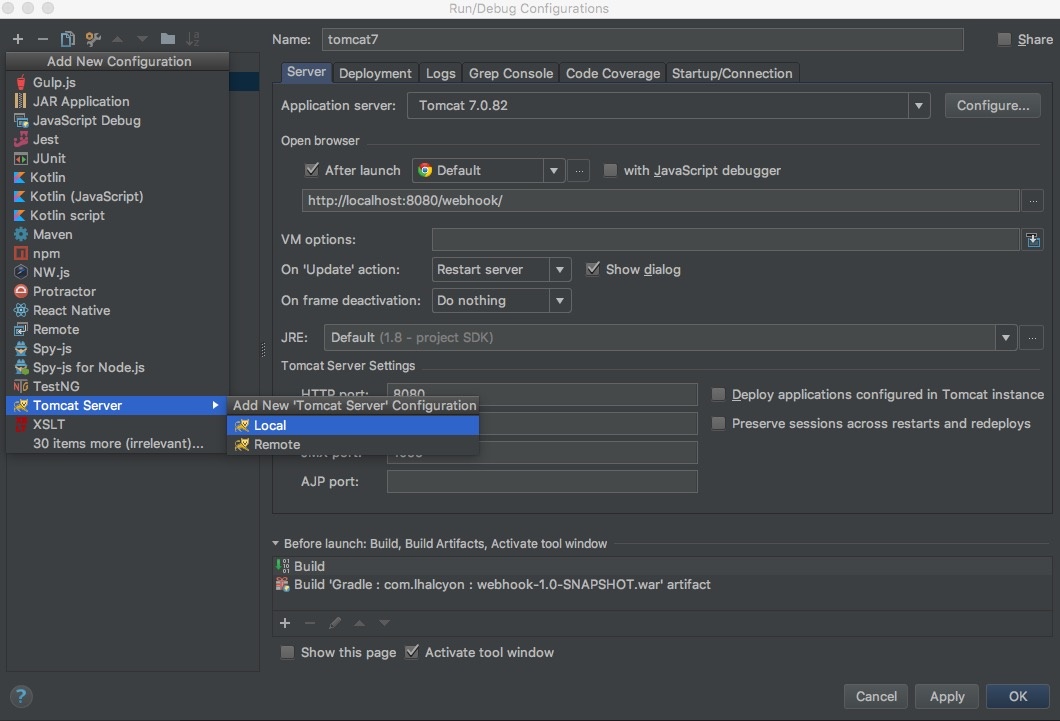
有fix项点击配置即可,然后运行.
MyBatis配置
数据库管理工具笔者使用的是

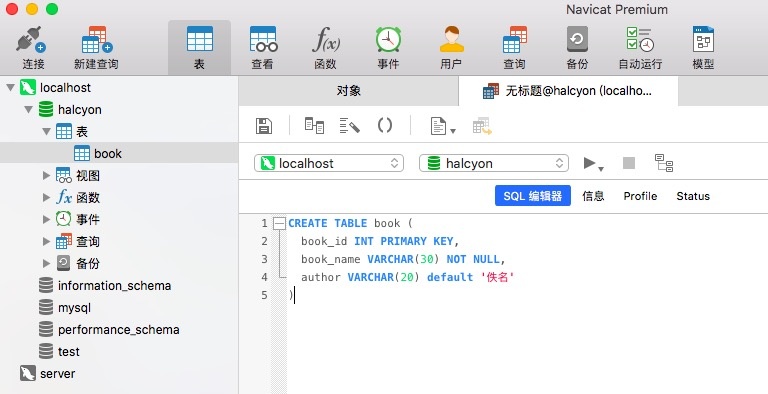
首先创建数据库halcyon,接着创建book表,用于后面的mybatis generator
1
2
3
4
5
| CREATE TABLE book (
book_id INT PRIMARY KEY AUTO_INCREMENT,
book_name VARCHAR(30) NOT NULL,
author VARCHAR(20) default '佚名'
)
|
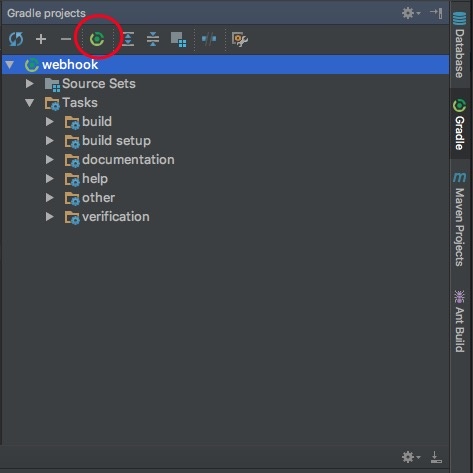
然后在gradle创建mybatis generator task

运行task
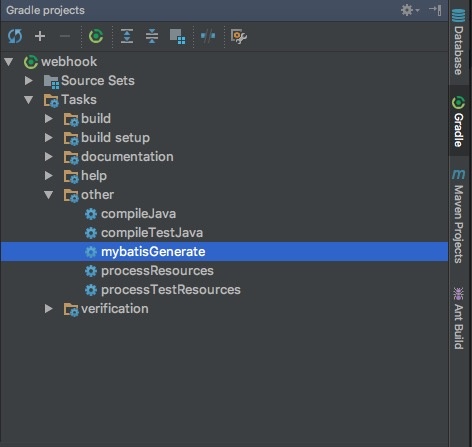
运行成功后,会生成与数据库表对应的java bean与dao文件,即项目里的Book.java、BookExample.java、BookMapper.xml、BookMapper.java
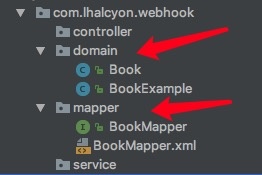
generatorConfig.xml配置参数可自行搜索补充修改🤔.手动覆写下Book的toString方法方便日志输出
测试
为了满足同时测试Spring、SpringMVC、Mybatis,笔者建立一个Controller通过Get请求进行CURD操作.
Service
1
2
3
4
5
6
7
8
9
10
11
12
13
14
15
16
17
18
19
20
21
22
23
24
25
26
27
28
29
30
| @Service
public class BookServiceImpl implements BookService {
@Autowired
private BookMapper bookMapper;
@Override
public void insertBook(Book book) {
bookMapper.insert(book);
}
@Override
public void updateBook(Book book) {
bookMapper.updateByPrimaryKey(book);
}
@Override
public List<Book> getAllBooks() {
BookExample example = new BookExample();
return bookMapper.selectByExample(example);
}
@Override
public void deleteBookById(int bookId) {
BookExample example = new BookExample();
example.createCriteria().andBookIdEqualTo(bookId);
bookMapper.deleteByExample(example);
}
}
|
Controller
1
2
3
4
5
6
7
8
9
10
11
12
13
14
15
16
17
18
19
20
21
22
23
24
25
26
27
28
29
30
31
32
33
34
35
36
37
38
39
40
41
42
43
44
45
46
47
48
49
50
| @RestController
public class BookController {
private static final Logger logger = Logger.getLogger(BookController.class);
@Autowired
private BookService bookService;
@RequestMapping(value = "/insert",method = RequestMethod.GET)
public String insert(String bookName,String author){
Book book = new Book();
book.setBookName(bookName);
book.setAuthor(author);
bookService.insertBook(book);
return queryStrings();
}
@RequestMapping("/update")
public String updateAuthor(int bookId,String bookName,String author){
Book book = new Book();
book.setBookId(bookId);
book.setBookName(bookName);
book.setAuthor(author);
bookService.updateBook(book);
return queryStrings();
}
@RequestMapping("/delete")
public String deleteBook(int bookId){
bookService.deleteBookById(bookId);
return queryStrings();
}
@RequestMapping("/find_all")
public String getAllBooks(){
List<Book> books = bookService.getAllBooks();
logger.info(books);
return books.toString();
}
private String queryStrings(){
List<Book> allBooks = bookService.getAllBooks();
return allBooks.toString();
}
}
|
直接通过请求地址,获得结果
插入:
1
| http://localhost:8080/webhook/insert?bookName=java&author=jack
|

执行后直接将数据库中所有book记录输出,方便观察.
其它操作类似
更新:
1
| http://localhost:8080/webhook/update?bookId=3&bookName=go&author=joe
|
删除:
1
| http://localhost:8080/webhook/delete?bookId=4
|
查询(所有):
1
| http://localhost:8080/webhook/find_all
|
如若发生500 Invalid bound statement (not found)类似错误,一般是没有扫描到Mapper.xml.其中一种情况下是xml根本没被打包进war.需要在build.gradle中进行配置,并且配置后Sync或Import Changes,再重新用命令./gradlew build才可生效.
1
2
3
4
5
6
| //将src文件夹中的资源文件同时打包
processResources {
from('src/main/java') {
include '**/*.xml'
}
}
|
至此SpringMVC+MyBatis+Gradle项目已经构建测试完毕.
代码已上传GayHub,文章若对各位大佬有帮助,麻烦顺手点个star~ ❤️
各位可能发现了,SSM配置起来比较繁琐,相比之下,SpringBoot就精简了许多.后面有机会,我们再来细说 🤒
- 参考: https://www.cnblogs.com/bojuetech/p/5844413.html
- 参考: http://blog.csdn.net/kingboyworld/article/details/78251425


