Webhook是一个API概念,并且变得越来越流行。我们能用事件描述的事物越多,webhook的作用范围也就越大。Webhook作为一个轻量的事件处理应用,正变得越来越有用。
准确的说webhook是一种web回调或者http的push API,是向APP或者其他应用提供实时信息的一种方式。Webhook在数据产生时立即发送数据,也就是你能实时收到数据。这一种不同于典型的API,需要用了实时性需要足够快的轮询。这无论是对生产还是对消费者都是高效的,唯一的缺点是初始建立困难。
Webhook有时也被称为反向API,因为他提供了API规则,你需要设计要使用的API。Webhook将向你的应用发起http请求,典型的是post请求,应用程序由请求驱动。
在Android开发中会经常提交apk给测试人员进行测试,通常的做法是将构建完成的包上传至蒲公英 ,测试人员直接扫码下载并安装apk包从而进行测试.一般我们会将构建及发布过程自动化,可参考:
Linux+Jenkins+Gradle构建Android参数化自动打包(一) Linux+Jenkins+Gradle构建Android参数化自动打包(二)
文章中实现了apk上传蒲公英后邮件通知,可是实际中,大家对邮件的关注远远没有对IM消息的关注度高,所以接下来本文将说明,实现上传apk后自动发送钉钉消息,将更新内容,apk版本号等信息通知到测试人员
环境准备 首先环境搭建是IntelliJ+SpringMVC+Gradle构建的,如有疑问的同学可参考IDEA+Gradle创建MyBatis+SpringMVC项目 ,项目中主要是对接口数据的调整及转发,实际上未用到MyBatis,可自行进行去除🙄.
模型建立 对照蒲公英doc 、钉钉doc 分别建立Java Bean.
PgyerMessage
1
2
3
4
5
6
7
8
9
10
11
12
13
14
15
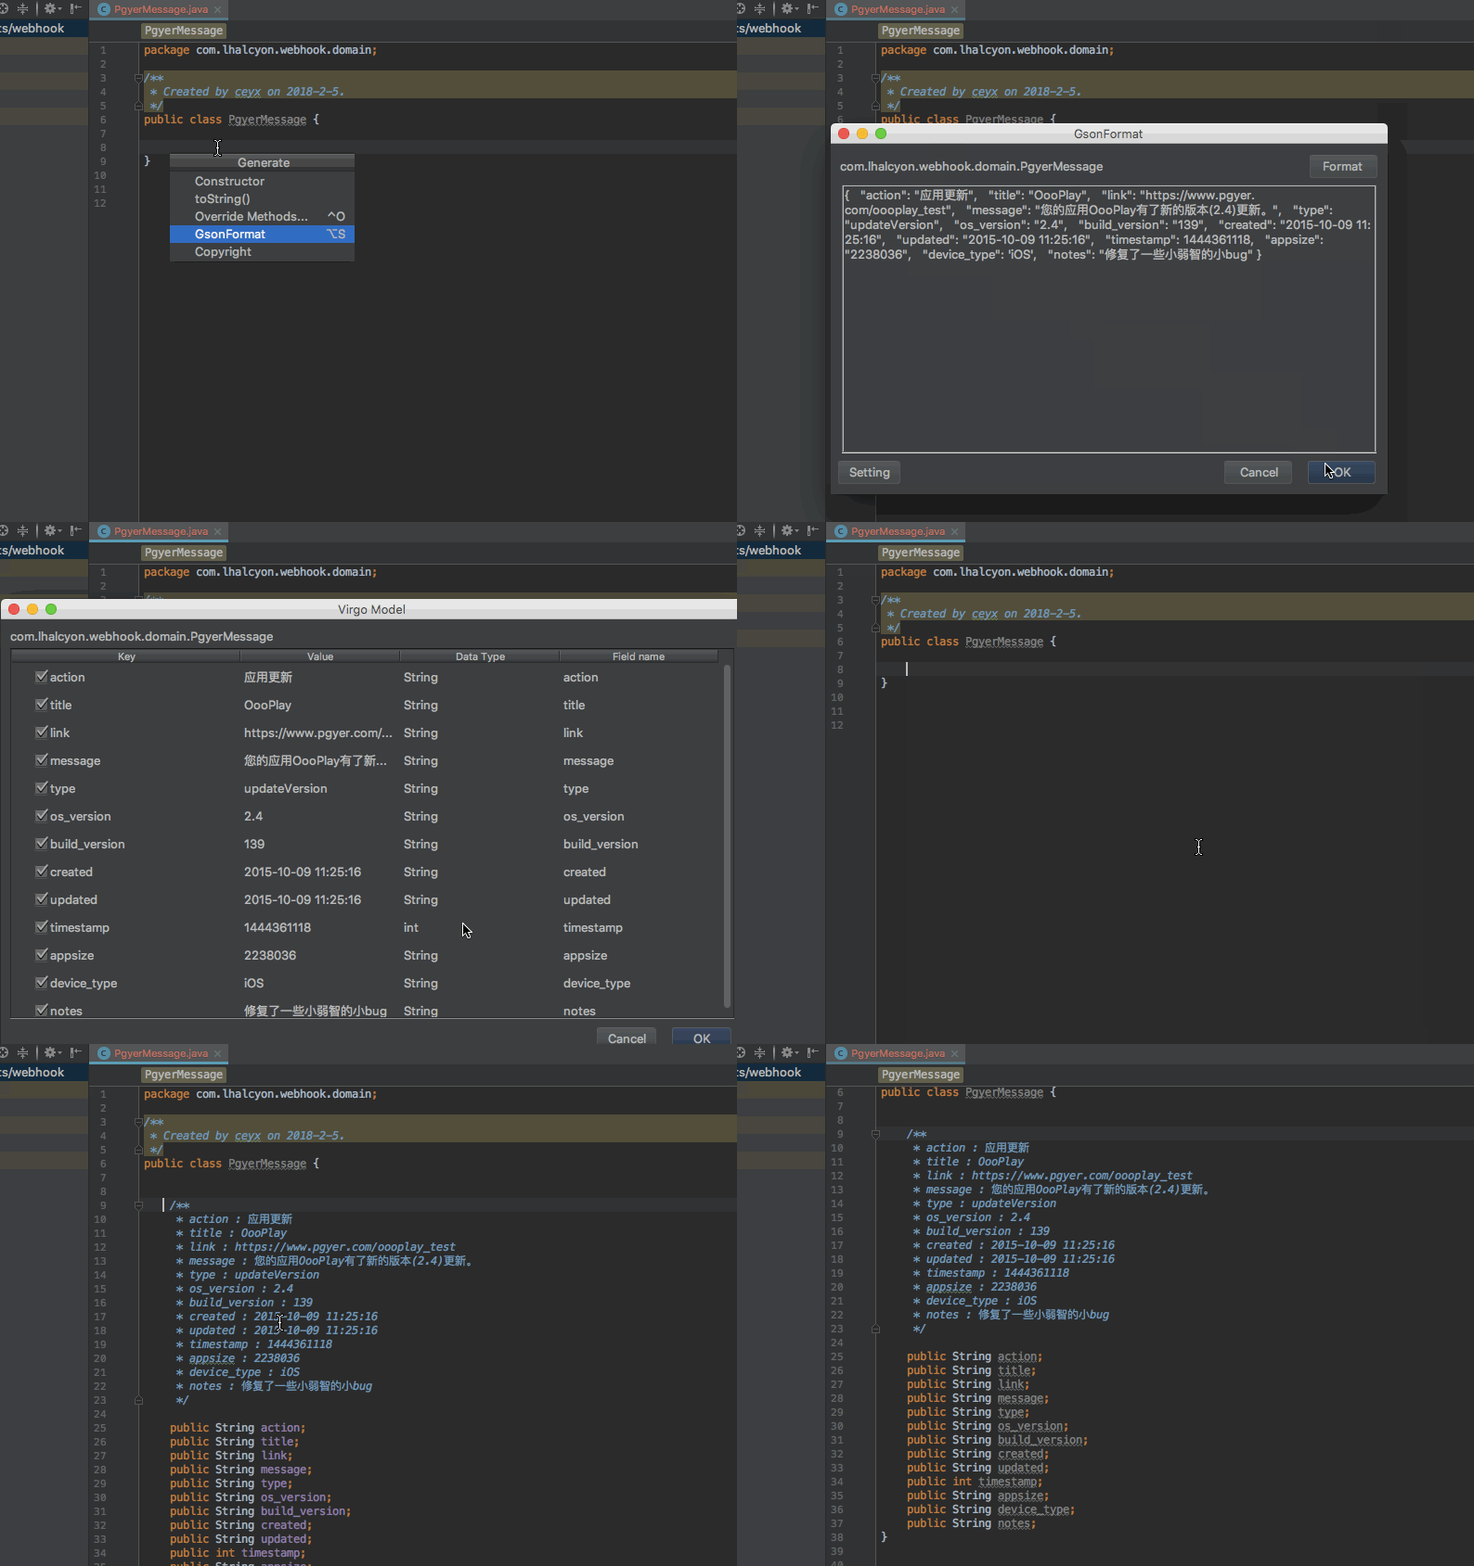
{ "action" : "应用更新" , "title" : "OooPlay" , "link" : "https://www.pgyer.com/oooplay_test" , "message" : "您的应用OooPlay有了新的版本(2.4)更新。" , "type" : "updateVersion" , "os_version" : "2.4" , "build_version" : "139" , "created" : "2015-10-09 11:25:16" , "updated" : "2015-10-09 11:25:16" , "timestamp" : 1444361118 , "appsize" : "2238036" , "device_type" : 'iOS', "notes" : "修复了一些小弱智的小bug" }
1
2
3
4
5
6
7
8
9
10
11
12
13
14
15
16
17
18
19
20
21
22
23
24
25
26
27
28
29
30
31
32
33
34
35
public class PgyerMessage { public String action; public String title; public String link; public String message; public String type; public String os_version; public String build_version; public String created; public String updated; public int timestamp; public String appsize; public String device_type; public String notes; @Override public String toString () { return "PgyerMessage{" + "action='" + action + '\'' + ", title='" + title + '\'' + ", link='" + link + '\'' + ", message='" + message + '\'' + ", type='" + type + '\'' + ", os_version='" + os_version + '\'' + ", build_version='" + build_version + '\'' + ", created='" + created + '\'' + ", updated='" + updated + '\'' + ", timestamp=" + timestamp + ", appsize='" + appsize + '\'' + ", device_type='" + device_type + '\'' + ", notes='" + notes + '\'' + '}' ; } }
此处有个小技巧,IDEA IntelliJ有个好用的插件GsonFormat可一键将Json字符串转换为Java Model
钉钉消息则分为几种类型,具体举例可参考钉钉doc
1
2
3
4
5
6
7
8
9
public static final String TYPE_LINK = "link" ;public static final String TYPE_MARKDOWN = "markdown" ;public static final String TYPE_TEXT = "text" ;public static final String TYPE_ACTIONCARD = "actionCard" ;public static final String TYPE_FEEDCARD = "feedCard" ;
此处我们选择markdown类型.为了便于拓展,此处将消息抽取了个基类BaseDingMessage.
1
2
3
4
5
6
7
8
9
10
11
12
13
14
15
16
17
18
19
20
21
public class BaseDingMessage { public static final String TYPE_LINK = "link" ; public static final String TYPE_MARKDOWN = "markdown" ; public static final String TYPE_TEXT = "text" ; public static final String TYPE_ACTIONCARD = "actionCard" ; public static final String TYPE_FEEDCARD = "feedCard" ; public String msgtype; public AtBean at; public static class AtBean { public boolean isAtAll; public List<String> atMobiles; } }
1
2
3
4
5
6
7
8
9
10
public class MarkdownMessage extends BaseDingMessage { public MarkdownBean markdown; public static class MarkdownBean { public String title; public String text; } }
代码实现 首先在build.gradle中导入依赖
1
2
3
compile group: 'com.alibaba' , name: 'fastjson' , version: '1.2.45' compile group: 'com.squareup.okhttp3' , name: 'okhttp' , version: '3.9.0'
fastjson是用力啊转化json,okhttp用来网络请求
spring-mvc.xml加入json配置
1 2 3 4 5 6 7 8 9 10 11 12 13 14 15 16 17 18 19 20 21 22 23 24 25 26 27 28 29 30 31 32 33 34 35 36 37 38 <beans xmlns ="http://www.springframework.org/schema/beans" xmlns:xsi ="http://www.w3.org/2001/XMLSchema-instance" xmlns:context ="http://www.springframework.org/schema/context" xmlns:mvc ="http://www.springframework.org/schema/mvc" xsi:schemaLocation ="http://www.springframework.org/schema/beans http://www.springframework.org/schema/beans/spring-beans.xsd http://www.springframework.org/schema/context http://www.springframework.org/schema/context/spring-context.xsd http://www.springframework.org/schema/mvc http://www.springframework.org/schema/mvc/spring-mvc.xsd" > <context:component-scan base-package ="com.lhalcyon.webhook.controller" /> <bean id ="internalResourceViewResolver" class ="org.springframework.web.servlet.view.InternalResourceViewResolver" > <property name ="prefix" value ="/WEB-INF/views/" /> <property name ="suffix" value =".jsp" /> </bean > <mvc:annotation-driven > <mvc:message-converters register-defaults ="true" > <bean class ="com.alibaba.fastjson.support.spring.FastJsonHttpMessageConverter" > <property name ="supportedMediaTypes" > <list > <value > text/html;charset=UTF-8</value > <value > application/json</value > <value > application/xml;charset=UTF-8</value > </list > </property > </bean > </mvc:message-converters > </mvc:annotation-driven > <mvc:resources mapping ="/statics/**" location ="/WEB-INF/statics/" /> </beans >
消息发送服务DingServiceImpl.java
1
2
3
4
5
6
7
8
9
10
11
12
13
14
15
16
17
18
19
20
21
Service public class DingServiceImpl implements DingService { private static final Logger logger = Logger.getLogger(DingServiceImpl.class); @Override public void send (BaseDingMessage message,String url) { MediaType jsonType = MediaType.parse("application/json; charset=utf-8" ); okhttp3.RequestBody body = okhttp3.RequestBody.create(jsonType, JSON.toJSONString(message)); final Request request = new Request .Builder() .url(url) .post(body) .build(); OkHttpClient client = OkhttpProvider.get(); try { client.newCall(request).execute(); } catch (IOException e) { e.printStackTrace(); } } }
蒲公英请求控制器PgyerController.java
1
2
3
4
5
6
7
8
9
10
11
12
13
14
15
16
17
18
@RestController @RequestMapping("/pgyer") public class PgyerController { @Autowired DingService dingService; private static final Logger logger = Logger.getLogger(PgyerController.class); @ResponseBody @RequestMapping(value = "/update",method = RequestMethod.POST) public BaseDingMessage apkUpdate (@RequestBody PgyerMessage pgyerMessage) { BaseDingMessage dingMessage = WebhookConverter.pgyer2Ding(pgyerMessage); dingService.send(dingMessage, Urls.DING_TEST); logger.info(dingMessage); return dingMessage; } }
其中Urls.DING_TEST为钉钉机器人的会话token地址,后面会说明如何创建/获取
消息转换器WebhookConverter.java
1
2
3
4
5
6
7
8
9
10
11
12
13
14
15
16
17
18
19
20
21
22
23
24
public class WebhookConverter { private static final Logger logger = Logger.getLogger(WebhookConverter.class); public static MarkdownMessage pgyer2Ding (PgyerMessage pgyerMessage) { MarkdownMessage message = new MarkdownMessage (); message.msgtype = BaseDingMessage.TYPE_MARKDOWN; message.markdown = new MarkdownMessage .MarkdownBean(); message.markdown.title = pgyerMessage.device_type + "蒲公英更新" ; StringBuilder builder = new StringBuilder (); builder.append("#### " ).append(pgyerMessage.device_type).append("测试包已更新! \n\n" ) .append("###### version: " ).append(pgyerMessage.os_version).append(" | build " ).append(pgyerMessage.build_version).append("\n\n" ) .append("更新内容:\n" ).append("> " ).append(pgyerMessage.notes).append("\n\n" ) .append("\n\n" ) .append("[下载地址](https://www.pgyer.com/你的apk地址) 密码:你的密码\n" ).append(" @18810100000 @18810100001 @18818100002 " ); message.markdown.text = builder.toString(); message.at = new BaseDingMessage .AtBean(); message.at.isAtAll = false ; message.at.atMobiles = Arrays.asList("18818100000" ,"18818100001" ,"18818100002" ); return message; } }
以上需自行修改内容.
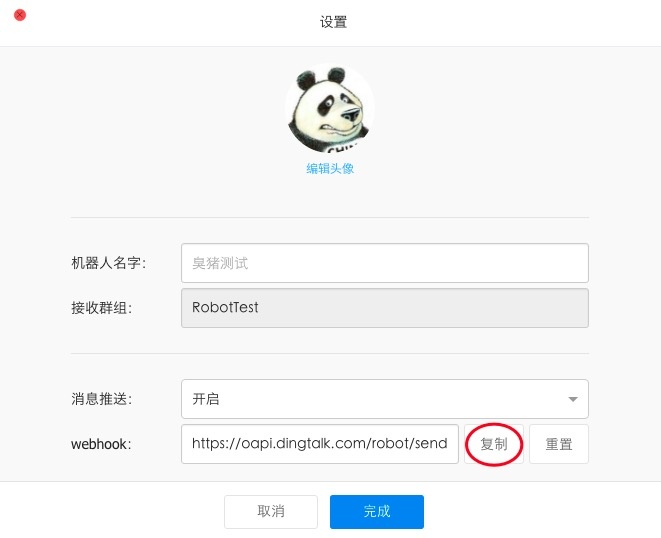
然后创建钉钉机器人.创建四连
1
2
3
4
点此复制钉钉机器人会话token,建立Urls.java.
1
2
3
4
5
6
7
public interface Urls { String DING_TEST = "钉钉token" ; }
此处的Ding_Test即为上面复制的地址
至此,代码主要实现类已经完成,接下来需要去配置蒲公英webhook
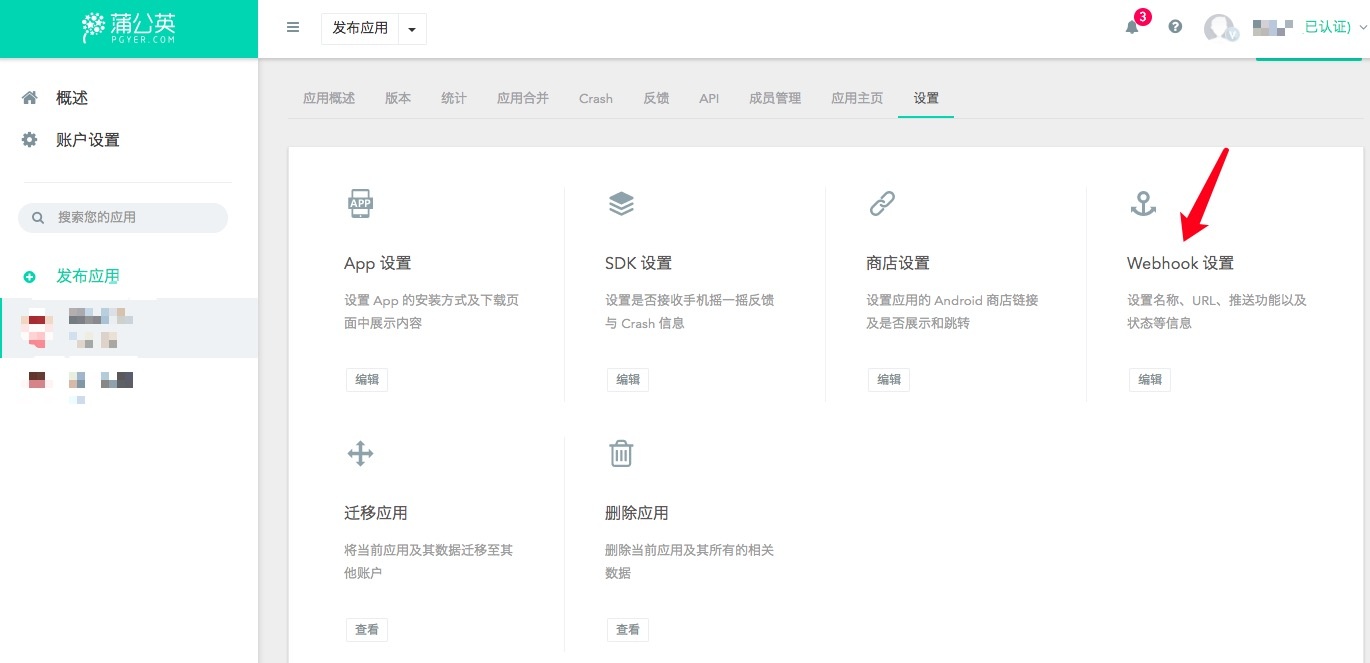
配置webhook 打开 蒲公英 应用设置
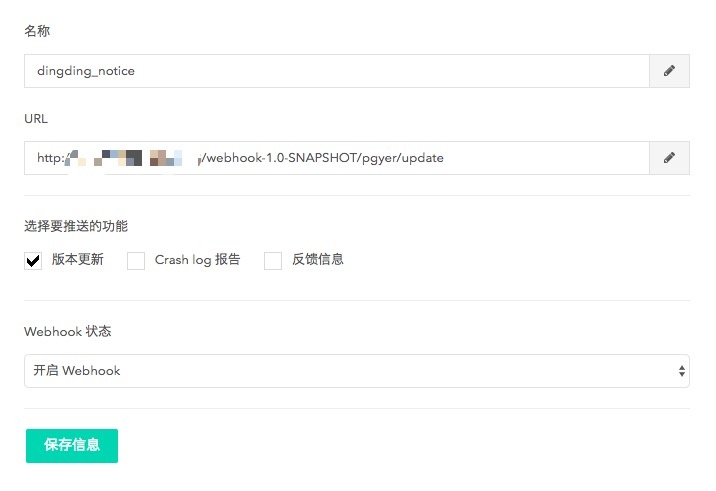
创建webhook,写入PgyerController的更新请求地址,如果配置与本文的相同,地址则为
1 http://你的地址:端口/webhook-1.0-SNAPSHOT/pgyer/update
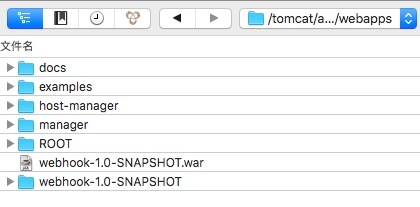
其中webhook-1.0-SNAPSHOT为war包在tomcat解压后的名称
done! 之后只要上传成功后,即有钉钉消息通知并@测试人员了!
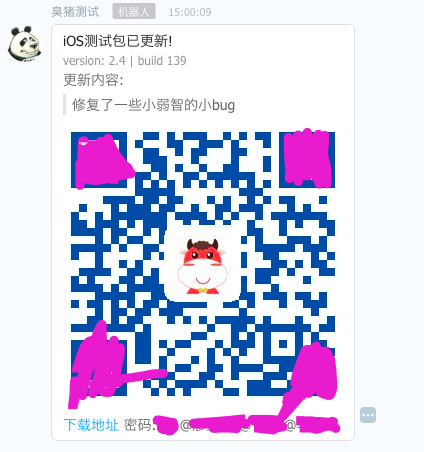
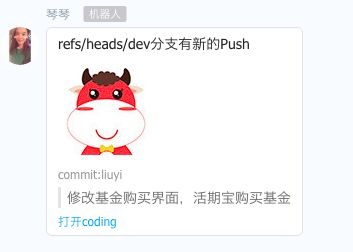
让我们再看下打包后的消息通知!
.jpg)
类似的,代码push,merge也可以做成webhook消息.
Github、Gitlab既有成熟的对接机器人.而笔者使用的Coding 是没有与钉钉做对接的,此时可自定义机器人实现,有兴趣的同学可参考上面的教程自行实现.
